INIFLEX custom insulation jacket can be installed in five easy steps:
1. First unroll the jacket and fit the foam around the tank. Move back and forth to
compensate for the foam’s tendency to stick to the tank walls.
2. Fit the jacket around the tank and fasten. Attach the caps onto the shell. If it is a vertical tank, pull the draw string at the bottom to fit the jacket snugly.
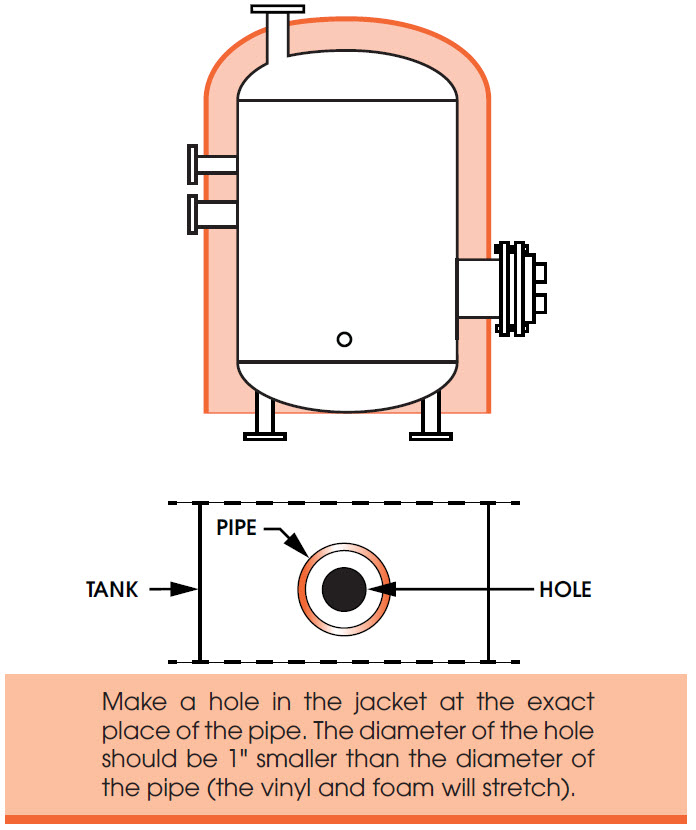
3. After the insulation is completely attached, tap around the edges of the tank
openings with a mallet to imprint them on the jacket surface.
4. With a sharp knife, cut holes in the jacket along the opening imprints.
5. Connect all valves, instruments, caps, pipes and other fittings through the openings.
CAUTION:
DO NOT SLIDE HORIZONTAL TANK ON ITS SKIDS AFTER JACKET INSTALLATION.
While not necessary, for better insulation, place insulation between the pipe and jacket with silicon caulking or tape around the pipe.
FOR OUTDOOR INSTALLATION
Place tape on the velcro seams to protect from rain or snow. Holes for the pipes must be caulked or taped for protection.
INIFLEX EASY CARE
Each INIFLEX jacket has a durable PVC vinyl shell tested to withstand over 300 hours of continuous sunlight without fading. It is easily cleaned with mild, non-abrasive soap and water.
VELCRO® TANK INSULATION
INIFLEX design features a rectangle-shaped section which is attached around the cylindrical part of the tank, and circular caps, one for vertical and two for horizontal tanks.
Each INIFLEX jacket is custom manufactured to your exact tank dimensions, shipped to your job site, and then fastened in minutes.
created with
Offline Website Builder Software .